-
CollectionView Cell 이동 시키기 (2) - UICollectionView Drag and Drop DelegateiOS 2022. 6. 10. 22:05
UICollectionView Drag And Drop Delegate
iOS 11.0+ 에서 적용할 수 있는 drag and drop Delegate은 collectionView 뿐만 아니라 app과 app 사이의 copy/paste를 지원하고 content의 이동도 담당해준다.
UICollectionView에서 제공 되는 Drag와 Drop delegate 사용하여 셀의 이동을 구현 해보자.
collectionView.dragDelegate = self
collectionView.dropDelegate = self
기존의 cell dragging의 트리거가 되는 매개체는 gestureRecognizer였지만, DragDelegate는 단순히 dragDelegate를 채택 해주므로써 작동된다.
// DragDelegate
func collectionView(_ collectionView: UICollectionView, itemsForBeginning session: UIDragSession, at indexPath: IndexPath) -> [UIDragItem] {
        <#code#>
}
// DropDlegate
func collectionView(_ collectionView: UICollectionView, performDropWith coordinator: UICollectionViewDropCoordinator) {
        <#code#>
}
각 메소드는 DragDelegate와 DropDelegate의 필수 함수이다.
첫번째 메소드부터 살펴보자.
collectionView(_:itemsForBeginning:at:)
더보기You must implement this method to allow the dragging of items from your collection view. In your implementation, create one or more UIDragItem objects for the item at the specified indexPath. Normally, you return only one drag item, but if the specified item has children or can’t be dragged without one or more associated items, include those items as well.
The collection view calls this method one or more times when a new drag begins within its bounds. Specifically, if the user begins the drag from a selected item, the collection view calls this method once for each item that’s part of the selection. If the user begins the drag from an unselected item, the collection view calls the method only once for that item.
실행시 하나 이상의 특정 IndexPath의 UIDragItem 객체를 만든다. 보통 하나의 drag item을 반환한다.
delegate 메소드를 보면 UIDragItem를 반환 하라고 한다.
UIDragItem은 또 무엇인가?
UIDragItem
A representation of an underlying data item being dragged from one location to another.
- 한 지점에서 다른 지점으로 drag 되는 대표 기본 데이터
UIDragItem은 Drag하는데 사용 되는 데이터 표현이고 initializer를 보면 NSItemProvider로 초기화 할 수 있다.
그럼 NSItemProvider는 뭐지?
NSItemProvider
An item provider for conveying data or a file between processes during drag-and-drop or copy/paste activities, or from a host app to an app extension.- Drag와 Drop 또는 복사/붙여넣기 작업 중에 프로세스 간에 또는 host 앱에서 다른 앱으로 데이터 또는 파일을 전송하는 item provider
즉, DragDelegate에서 drag를 할 data를 NSItemProvider로 감싸고 그 싼 파일을 UIDragItem으로 다시 감싼후 반환 해주어야 한다.
공식 문서를 보자.
In your implementation of the collectionView(_:itemsForBeginning:at:) method, do the following:
- Create one or more NSItemProvider objects. Use the item providers to represent the data for your collection view’s items.
- Wrap each item provider object in a UIDragItem object.
- Consider assigning a value to the localObject property of each drag item. This step is optional but makes it faster to drag and drop content within the same app.
- Return the drag items from your method.
1. collectionView의 아이템을 가르키는 NSItemProvider를 만들고
2. UIDragItem으로 감싼 후
3. 선택 사항이지만 localObject로 감싸는 것이 drag and drop를 빠르게 하므로 고려 하는것이 좋다.
4. drag items를 반환 해준다. (여러개 가능)
그럼 여기서 드는 의문은 NSItemProvider는 모든 데이터로 초기화 할수 있는가?
NSItemProvider로 초기화 할 수 있는 데이터는 NSItemProviderWriter 프로토콜을 채택하고 NSObject를 상속 받아야 한다.
NSString, NSURL, UIColor 등은 이미 두 가지 조건을 만족 시키고 있다.
만약 직접 만든 모델 객체를 drag 하기 위해선 위의 조건을 만족시켜야 한다.
func collectionView(_ collectionView: UICollectionView, itemsForBeginning session: UIDragSession, at indexPath: IndexPath) -> [UIDragItem] {
        let item = color[indexPath.row]
        let itemProvider = NSItemProvider(object: item)
        let dragItem = UIDragItem(itemProvider: itemProvider)
        dragItem.localObject = item
        return [dragItem]
    }
color 배열에 있는 아이템을 위의 과정을 따라 반환해준다.

DragDelegate를 이용한 cell dragging 다음은 drag한 데이터를 어떻게 drop 하는지 알아보자.
drag한 item이 bounds 안으로 드래그되면, collectionView는 drop delegate에게 drag된 데이터를 받을 수 있는지 여부를 확인한다. 처음 collection view는 지정된 데이터를 data source에 통합할 수 있는지 결정하기 위해 drop delegate의 collectionView(_:canHandel:) 메소드를 우선적으로 호출한다.
- collectionView(_:canHandle:)
- Asks your delegate whether the collection view can accept a drop with the specified type of data.delegate에 collectionView가 해당 타입의 데이터의 drop을 받아 들일 수 있는지 물어본다.즉, drag한 cell을 drop하기 위해선 해당 메소드를 먼저 거쳐서 true를 반환할 경우만 다음 단계로 넘어갈 수 있다.func collectionView(_ collectionView: UICollectionView, canHandle session: UIDropSession) -> Bool { return true }- collectionView(_:dropSessionDidUpdate:withDestinationIndexPath:)
- Tells your delegate that the position of the dragged data over the collection view changed
delegate에 collection View에서 drag한 데이터의 위치가 변경 되었음을 알린다.
해당 메소드는 collectionView(_:itemsForBeginning:at:) 호출 후 collectionView(_:canHandel:) 메소드에서 반환 값을 확인 후에 cell이 움직일 때마다 호출된다.
collectionView(_:dropSessionDidUpdate:withDestinationIndexPath:)는 UICollectionViewDropProposal 값을 반환한다. 실행중 지정된 index path에 drop을 어떤식(복사, 삽입, 이동)으로 응답할 것인지에 대한 정보를 가지고 있는 UICollectionViewDropProposal 개체를 생성한다.
예를 들어 content를 데이터 원본에 새로운 item으로 삽입하거나 지정된 index path로 데이터를 기존 item으로 추가 할 수있다. 메소드가 자주 호출 되기 때문에 가능한 빨리 proposal 값을 반환해야 한다. 이 메소드를 구현하지 않으면 collectionView는 drop에 대한 시각적인 피드백을 제공하지 않는다.(데이터 수정은 가능)
고로 우린 drop에 대한 시각적인 애니메이션을 위해선 반드시 해당 메소드를 실행 해야한다.
func collectionView(_ collectionView: UICollectionView, dropSessionDidUpdate session: UIDropSession, withDestinationIndexPath destinationIndexPath: IndexPath?) -> UICollectionViewDropProposal {
        guard collectionView.hasActiveDrag else { return UICollectionViewDropProposal(operation: .forbidden) }
        return UICollectionViewDropProposal(operation: .move)
    }
collectionView가 drag하고 있다면 DropProposal의 move값을 반환해주고, 그렇지 않다면 drop하지 않겠다는 값을 리턴해준다.
collectionView(_:performDropWith:)
사용자가 화면에서 손가락을 때는 순간(drop을 커밋하면) collectionView는 drop delegate에서 collectionView(_:performDropWith:) 메소드를 호출한다. 이 메소드를 반드시 구현해야만 drop된 데이터에 대한 처리가 가능하다.
collectionView 밖에서 가져온 content의 경우 localObject 속성(컨텐츠가 같은 앱에 속한다면)이나 NSItemProvider 객체를 사용하여 데이터를 가져와 drop할수 있다.
공식 문서에 적혀있는 collectionView(_:performDropWith:) 메소드를 실행하는 방법이다.
In your implementation of the collectionView(_:performDropWith:) method, do the following:
- Iterate over the items property in the provided drop coordinator object.
- For each item, determine how you want to handle its content:
- If the sourceIndexPath of the item contains a value, the item originated in the collection view. Use a batch update to delete the item from its current location and insert it at the new index path.
- If the localObject property of the drag item is set, the item originated from elsewhere in your app so you must insert an item or update an existing item.
- If no other option is available, use the NSItemProvider in the drag item’s itemProvider property to fetch the data asynchronously and insert or update the item.
- Update your data source and insert or move the necessary items in the collection view.
drop한 item이 indexPath를 가지고 있다면 간단히 batchupdate를 사용하여 새로운 indexpath의 삭제와 삽입을 담당하면 된다.
drag된 item이 loclaObject 속성이라면, item이 앱의 다른 위치에서 끌어온 것이므로 item을 삽입하거나 기존 항목을 업데이트 해야한다.
위의 옵션을 사용할 수 없는 경우. NSItemProvider를 사용하여 비동기적으로 가져와야 한다.마지막으로 collectionView의 data source를 업데이트하고 삽입 하거나 필수 items를 이동시켜라.
func collectionView(_ collectionView: UICollectionView, performDropWith coordinator: UICollectionViewDropCoordinator) {

        if let destinationIndexPath = coordinator.destinationIndexPath {
            if let item = coordinator.items.first, let sourceIndexPath = item.sourceIndexPath {
                collectionView.performBatchUpdates {
                    color.remove(at: sourceIndexPath.item)
                    color.insert(item.dragItem.localObject as! UIColor, at: destinationIndexPath.item)

                    collectionView.deleteItems(at: [sourceIndexPath])
                    collectionView.insertItems(at: [destinationIndexPath])
                }
            }
        }
    }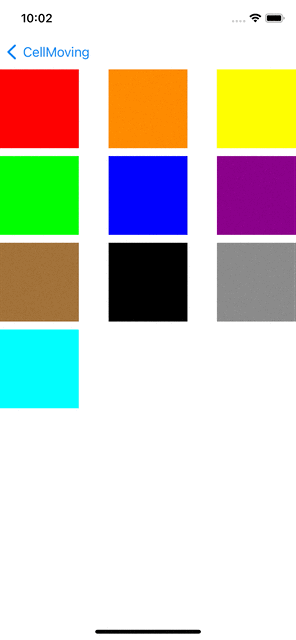
잉..? 애니메이션 마무리 상태가?
item이 앱에 local인 경우, 대게 collection view의 data source 및 interface를 직접 업데이트할 수 있다. 예를 들어 batch update를 통해 collection view의 item을 삭제 후 삽입할 수 있다. 작업이 끝난 후 drop coordinator를 통해 drop(_:toItemAt:) 메소드를 호출하여 drag된 content를 collection view에 삽입하는 애니메이션을 만든다.
drop(_:toItemAt:)
Use this method to animate the dragged item to the specific location in the collection view. Typically, you use this method for content that originated in the collection view and is moving to a new location.func collectionView(_ collectionView: UICollectionView, performDropWith coordinator: UICollectionViewDropCoordinator) { if let destinationIndexPath = coordinator.destinationIndexPath { if let item = coordinator.items.first, let sourceIndexPath = item.sourceIndexPath { collectionView.performBatchUpdates { color.remove(at: sourceIndexPath.item) color.insert(item.dragItem.localObject as! UIColor, at: destinationIndexPath.item) collectionView.deleteItems(at: [sourceIndexPath]) collectionView.insertItems(at: [destinationIndexPath]) } coordinator.drop(item.dragItem, toItemAt: destinationIndexPath) } } }
drop(_:toItemAt:) 메소드를 추가 해주므로써 부드러운 drop 애니메이션이 구현되었다.
Delegate 파트 전체 code
extension DragNDropCollectionViewController: UICollectionViewDragDelegate, UICollectionViewDropDelegate { func collectionView(_ collectionView: UICollectionView, itemsForBeginning session: UIDragSession, at indexPath: IndexPath) -> [UIDragItem] { let item = color[indexPath.row] let itemProvider = NSItemProvider(object: item) let dragItem = UIDragItem(itemProvider: itemProvider) dragItem.localObject = item return [dragItem] } func collectionView(_ collectionView: UICollectionView, performDropWith coordinator: UICollectionViewDropCoordinator) { if let destinationIndexPath = coordinator.destinationIndexPath { if let item = coordinator.items.first, let sourceIndexPath = item.sourceIndexPath { collectionView.performBatchUpdates { color.remove(at: sourceIndexPath.item) color.insert(item.dragItem.localObject as! UIColor, at: destinationIndexPath.item) collectionView.deleteItems(at: [sourceIndexPath]) collectionView.insertItems(at: [destinationIndexPath]) } coordinator.drop(item.dragItem, toItemAt: destinationIndexPath) } } } func collectionView(_ collectionView: UICollectionView, canHandle session: UIDropSession) -> Bool { return true } func collectionView(_ collectionView: UICollectionView, dropSessionDidUpdate session: UIDropSession, withDestinationIndexPath destinationIndexPath: IndexPath?) -> UICollectionViewDropProposal { guard collectionView.hasActiveDrag else { return UICollectionViewDropProposal(operation: .forbidden) } return UICollectionViewDropProposal(operation: .move) } }'iOS' 카테고리의 다른 글
AVAudioFile과 AVAudioBuffer (0) 2022.06.30 CollectionView Cell 이동 시키기 (1) - 기존 방식과 custom InteractiveMovement (0) 2022.06.09 WWDC) Animation hitch와 render loop (0) 2022.04.05 Cocoapods) custom 라이브러리에 이미지 파일 embedded 하기 (0) 2021.08.04 iOS) Dynamic TextView의 Underline - TextView에 밑줄 추가하기 (0) 2021.03.05
